Tuesday, June 27, 2006
Divining colander
Sunday, June 25, 2006
A condiment for a continent?
Friday, June 23, 2006
Treat your cucumber nicely
Wednesday, June 21, 2006
No beating, no pricking..please.
In Miss Eagle's family home, there were two cookery crimes. One was beating meat with a mallet or a rolling pin with the aim of tenderizing it. The other was pricking sausages prior to cooking in the belief that this would prevent sausage meat oozing from its skin. You see, dear Reader, Miss Eagle's father was not only a great cook - as was her mother - but he was a trade-qualified butcher in the early part of the 20th century when the training was quite extensive. On beating steak to tenderize it
Jack O'Carroll, Miss Eagle's father, believed that no amount of beating could make a tough steak tender. In fact, one of the effects of beating steak was to expel the juices from the steak which tenderized it during the cooking process. How to get a tender steak:
- Choose a cut of steak appropriate to the cooking process. For instance, topside and round steaks are not grilling steaks. A corner piece of topside makes a very good roast. Sliced topside and round steak are best cooked slowly in casseroles, stews, and curries. Similarly, one would not bother to use Scotch or Rib Fillet or Eye Fillet in a casserole. These cuts are best suited to grilling or pan frying (dry frying). Rump Steak is quite versatile. It is a superb grilling steak. As a whole rump, it can be a beautiful roast. Sliced, it can go well in a casserole. However, rump is usually more expensive than topside or round so one would not bother using such a cut in a casserole when a less expensive cut would do as well.
- Understand how to cook meat. Understand the cuts of beef. In this day and age, there is a great demand for lean beef. Fat marbled through beef is what contributes to its tenderness. The way a side of beef is hung by a butcher and the length of time it is aged contributes to its tenderness. Miss Eagle, as her father and grandfather (a livestock auctioneer) before her, has a preference for beef from Poll Shorthorn cattle. Indeed, Miss Eagle believes the beast should not have to walk far to eat and its food should be unstinted lush green grass. Such a beast produces beef that is not red but purple with creamy specks of fat marbled through it. Now that is tender beef.
On pricking a sausage to prevent it oozing
- In these modern times, sausage casings can vary from the natural product to the synthetic. Again, the secret is to learn about sausages. Know what a quality sausage is. And you can't go past a German butcher to teach you. Miss Eagle's paternal grandmother always had a German butcher hovering in the background.
- Learn how to cook a sausage. Pricking sausages does not prevent oozing if your sausage is cooked incorrectly or the casing of poor quality.
- To cook a sausage properly and well, pour a small quantity of Extra Virgin Olive Oil across the base of a heavy frying pan. Place the sausages in the pan. Turn them to coat them in oil. Then place them on the hotplate or burner and turn on the heat. Yes, start cooking the sausages cold and turn up the heat slowly and gently. Heat is applied slowly and gently so that the sausages adjust slowly to the cooking process. Only when the sausages have plumped up gently in this way can the heat be turned up further to complete the browning and cooking process. In this way, you will have a fat, juicy sausage which does not pop its skin.
Tuesday, June 20, 2006
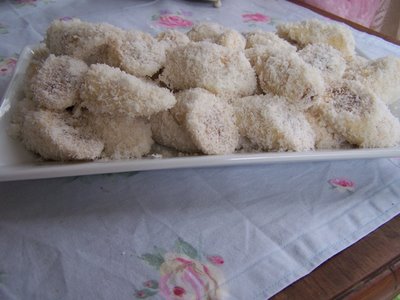
Banana in Coconut
Monday, June 19, 2006
Patrick and The Butterfly Cakes
Pane e cioccolata : Bread and chocolate
Much jollity at The Trad Pad on Sunday. Piece de resistance was the Bread and Chocolate Pudding from Steve Manfredi's recipe. If you are looking for a pudd that is great hot or cold; is lush and luxurious and yet traditional - then this is it. It is a bread pudding with the bread smothered in cream, mixed with a wonderful egg mixture, and laced with chocolate. It is served with a chocolate sauce which is to die for - and the easiest chocolate sauce ever. Refer to this chocolate sauce frequently because, being so easy, you will use it with everything.
Here is the recipe:
Warm bread and chocolate pudding
Moisten 400g of bread (crusts cut off, chopped in small pieces) in a bowl with 300ml of cream. Roast 100g of blanched almonds until they're golden and roughly chop them. Beat 2 egg yolks with 50g of vanilla sugar until pale. Whisk 2 egg whites with 50g of vanilla sugar to form stiff peaks. Add the almonds to the bread, along with the grated rind of an orange, the egg yolks and egg whites, and 80g of chopped dark chocolate. Butter six ramekins (or one pudding bowl) and spoon the mixture in. Bake in a preheated 160C oven for 40 minutes. Serve warm with chocolate sauce.
Chocolate sauce
Heat 250ml of single cream in a small saucepan. Roughly chop 300g of good chocolate and place in a bowl. When the cream is just about to boil, take it from the heat and pour it over the chocolate. Let it sit for 30 seconds so the chocolate melts, then mix it well with a fork or a small whisk until it becomes smooth and shiny. The chocolate sauce is now ready to be used. Any leftover sauce can be stored, covered, in the refrigerator and can be remelted carefully by bringing a pot of water to the boil, putting the bowl containing the chocolate over the pot and slowly melting it. Make sure the bottom of the bowl does not sit in the boiling water.
Miss Eagle's notes: Because we had a large number of guests, Miss Eagle didn't use ramekins. Instead she made a double mixture and baked it in a huge dish. She did not include the almonds since we are not all that keen on them at The Trad Pad. Next time, to make it more luxurious and tasty, Miss Eagle will add a liqueur. Go to the link and you will find suggestions for what liqueur you might use. Miss Eagle served the pudd warm but went back for seconds when it was cold - and, if anything, it was even better.
Tuesday, June 13, 2006
Beef Olives
When Miss Eagle was but an eaglet and doing Domestic Science classes in Grades 7 and 8, one of the earliest items in the repertoire was Beef Olives. This was the time when the Sunday Roast and Three Veg reigned supreme. The height of culinary achievement in the Australian home at that time was the baked dinner. Now Beef Olives is a way of doing a simple baked dinner - a baked dinner on a budget, a baked dinner that did not take as long as the Sunday joint, a baked dinner simplified. In this day and age, it is even simpler to do. The Kitchen Whizz/Food Processor takes care of the seasoning/stuffing. A convection oven - or even a microwave - can speed up the cooking time. Here is Miss Schauer's classic recipe.
Biscuit dough
Monday, June 12, 2006
On the menu 2: Oxtail Stew
Oxtail Stew is highly nutritious: meat, bones, and vegetables.
Once upon a time, an oxtail was bought whole - so that the purchased would get the large thick bones from the top of the tail and the fine, thinner ones from the bottom of the tail. Now this can still happen if you have the good fortune to use a good, old fashioned butcher. But if you are used to purchasing your meat at the supermarket all wrapped and stacked, then I need to explain this. Because what can happen with the pre-packaged oxtail is that you may not get the whole tail. This is what happened to Miss Eagle as she purchased her oxtail at Woolworths one weekend when the good old fashioned butcher was closed and the butcher in the shopping mall tried to sell her a pickled ox-tail - whatever that may be. Miss Eagle picked up a pack labelled "Tail" not "Oxtail" and thought it was awfully small. There should be more to it than this. And the bones were small. Miss Eagle looked again and there was another pack on the shelf with the large bones in it - so Miss Eagle had to purchase two packs to make one oxtail. The modern handling of beef!
The picture above shows the whole oxtail lying on a bed of vegetables. Mushrooms were added later. You can, if you wish, throw the oxtail and your choice of vegetables into a big pot and cover with water and salt and simmer away until ready. However, Miss Eagle prefers the following method.
Take a baking pan and layer your vegetables. The very first to go in is Cabbage, sliced and laid across the pan. Other vegetables are, Carrots, sliced into rings, Celery, chopped finely, a few Celery Tops, Onions, Potato, Mushrooms, and Garlic. On top of this place the Oxtail so that it looks like the photograph. Bake in a low oven (about 105 degrees Celsius) for about an hour. If the oxtail is very fatty, the fat will go to the bottom of the pan and can be drained off. Keep an eye on the baking, you don't want the vegetables to catch. Then, add your choice of herbs, don't forget the salt, and put in a large pot and bring to the simmer on the top of the stove. If you have a large cassoulet pot, this could be done in the oven. Now Miss Eagle needs to tell you that she considers Oxtail Stew a two-day event. This is to do the ever so slow cooking on Day 1. Then next day drain off any fat that has solidified on top of the stew before re-heating, thickening the stew with a paste of Plain Flour and water, and serving. With slow cooking food, it is - more often than not - better on Day 2 when you will find a greater enhancement of flavours. When your Oxtail comes to table the meat should be falling off the bone. Now this is beautiful served just with a sourdough bread and butter. However, there are two enhancements that can be made either alone or together. Give the Oxtail a hint of Central Europe by adding sour cream and stirring well in to blend about ten to fifteen minutes prior to serving. The other is to take your favourite scone recipe (see Miss Eagle's Scone Fest recipes) and do one of two things. If you are finishing the stew on your stovetop break off the dough and roll into balls (a bit of parsley is just the thing in these dumplings) place on top of stew and put a lid on top. These will cook in ten to fifteen minutes. Needless to say you do not have to serve bread with this. If you are finishing the stew in the oven, cut out the scones as usual and put on top of the stew. Do not put the lid on the pot. The scone topping will be moist underneath and brown on top and will cook in ten to fifteen minutes if you turn the oven up a little. Bon appetit! Scrumptious!